Using Caulk |
|
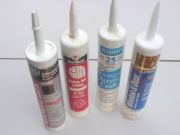
Caulk is used to seal joints between two surfaces. It may be used indoors or outdoors between almost any surfaces. There are many different types of caulk, so check the tube for usage instructions to ensure you are using the right kind. |
 |
|
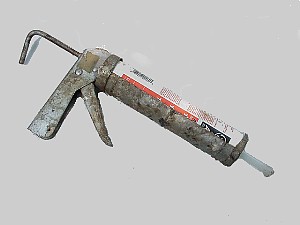
Items needed:
Caulk
Caulk gun Nail or wire Utility knife |
Safety Suggestions and Tips
Use correct type of caulk
Place large nail in tube after use Remove any previous or loose caulk |
Level of difficulty
 Time Required: 1 hours
|
|
|
|
Steps |
|
|
|
|
Step 1: There are a lot of caulks available. If you want some help, General
Electric and DAP have great web pages that
will help you pick the right caulk. |
|
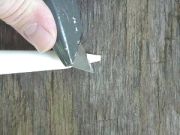
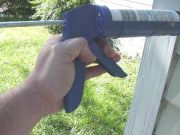
Step 2: Make sure that the area you want to caulk is clean of any debris. Take the tube of caulk and, using a utility knife (held at a 45 degree angle) cut the end from the tapered nozzle. |
|
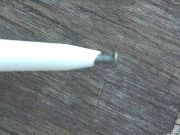
Step 3: The farther away from the end of the nozzle you cut, the bigger the bead of caulk that will be available. After you cut the nozzle, take a wire or nail and pierce the foil at the bottom of the nozzle. |
|
|
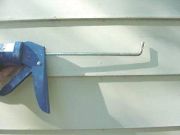
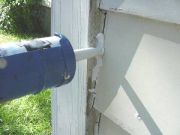
Step 4: Turn the handle on the caulk gun so that it faces up. Pull the handle all the way back and put the tube of caulk in the gun. |
|
|
Step 5: Turn the handle down and push the handle until it stops against the end of the tube. |
|
|
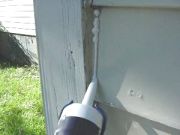
Step 6: There are two ways to caulk. You can "push" the bead of caulk ahead of the nozzle. |
|
|
Step 7: you can "pull" the bead behind the nozzle. I prefer to pull the bead as you tend not to drag the nozzle through the caulk. Using the method you prefer, apply the caulk sparingly to the joints to be sealed. |
|
|
Step 8: Use constant pressure on the trigger to ensure an even flow of caulk. Seal the entire length. When you are done, make sure that you turn the handle up so that the pressure on the tube is released. |
|
|
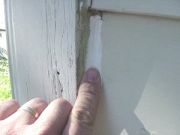
Step 9: Using your finger or a wet spoon, simultaneously smooth the bead of caulk and force it into the joint. Again, use the caulk sparingly as it is easier to add more caulk than it is to clean up too much. |
|
|