|
|
|
|
|
Step 5: Turn the handle down and push the handle until it stops against the end of the tube. |
|
|
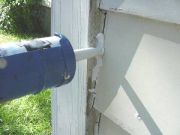
Step 6: There are two ways to caulk. You can "push" the bead of caulk ahead of the nozzle. |
|
|
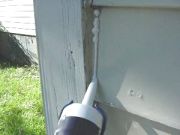
Step 7: you can "pull" the bead behind the nozzle. I prefer to pull the bead as you tend not to drag the nozzle through the caulk. Using the method you prefer, apply the caulk sparingly to the joints to be sealed. |
|
|
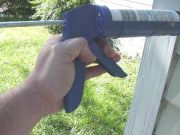
Step 8: Use constant pressure on the trigger to ensure an even flow of caulk. Seal the entire length. When you are done, make sure that you turn the handle up so that the pressure on the tube is released. |
|
|
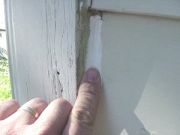
Step 9: Using your finger or a wet spoon, simultaneously smooth the bead of caulk and force it into the joint. Again, use the caulk sparingly as it is easier to add more caulk than it is to clean up too much. |
|
|
|
|
|
|
|
|
|
Related articles
|
||||