|
|
|
|
|
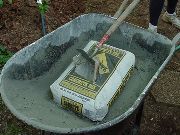
Step 5: Once the holes are to spec, it is time to mix the concrete and pour it. For this a concrete pan or large wheelbarrow is helpful. Place a bag of concrete into the wheelbarrow and tear it open. Be mindful of the warnings on the bag (concrete conatins silica) as tearing open the bag usually results in a cloud of dust. |
|
|
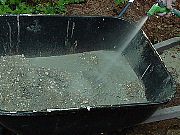
Step 6: Spray some water over the top of the concrete to keep the dust down. Gradually mix in the amount of water indicated on the bag. |
|
|
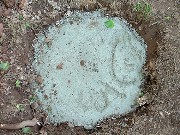
Step 7: Use a hoe to work the concrete mix. Ensure that all of the dry mix is brought from the bottom and mixed completely. Remember this when attempting to adjust the water/cement ratio - a little bit of water goes a long ways. If the mix seems too thick, add water sparingly and mix completely before adding more. When finished, dump your cement into the hole and level the top off. Let it cure overnight and then either moisten it with a hose or cover it with plastic. The package should indicate which method the manufacturer prefers. |
|
|
Step 11: Note that this installation comes flush with the ground. In many instances, it is preferable to use a circular form (inserted into the hole) to bring the level of the concrete above the ground. This particular installation is in a historic district and will utilize bricks as the above-ground component. |
|
|
|
|
|
|
|
Related articles
|
||||