|
|
|
|
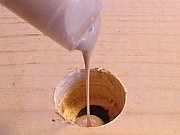
Step 5: Once the screw is set, put some glue in the hole in order to hold the plug. Carpenters glue is the appropriate for this use. Glue that has a dark tint (shown at left) may be used if a darker wood is being used (walnut or oak). Do not completely fill the hole, place a small amount in the bottom and insert the plug into the hole. Turn the plug from side to side to distribute the glue inside. Use a damp cloth to wipe any excess glue from around the dowel. |
|
|
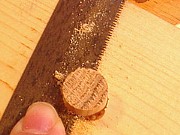
Step 6: Once the glue is set (check package for setting time), cut the plug flush with the surrounding wood. The best saw for this is a Japanese saw called a "Kugihiki" saw and it maybe be found here. Any saw that has little "set" (deflection) to the teeth will do. Note that the Kugihiki saw cuts on the pull stroke, not the push stroke like "American" saws do. A chisel is also appropriate for this job. |
|
|
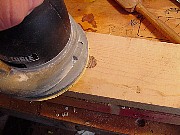
Step 7: Once the plug is cut off, it is a good idea to sand the plug flush to ensure it is flush and produce a finished look. It is especially important when using this method on thresholds and floors that the plug be flush. Any high spots will receive more abuse and the finish will wear more quickly. |
|
|
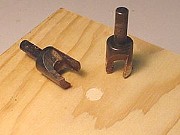
Optional: If the screws are being installed in flooring, a more finished appearance may be produced using "face grain" plugs. These plugs are normally a do-it-yourself job and should be cut from the same stock, if possible, that is being used for the job. |
|
|
|
|
|
|
|
|
|
Related articles
|
||||