Soldering ("Sweating) copper pipe joints is very easy if you remember not to heat the solder directly. Also remember that the flame from the torch is VERY HOT and will ignite any combustible materials in short order. It will also seriously burn you in under a second. See the notes for tips about real-world situations. PLEASE NOTE: These instructions are for water-supply pipes, not gas. The materials needed for this are usually available as a kit. |
 |
|
Items needed:
Solder (lead-free) |
Safety Suggestions and Tips
The torch used to melt the solder is HOT. Be very careful when using it.
|
Level of difficulty
 Time Required: 15 Minutes
|
|
|
|
Steps |
|
|
|
|
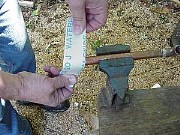
Step 1: Cut the pipe to length, use a file or sandpaper (preferrably plumbers roll) to smooth the edges. Next, sand the end of the pipe and the inside of the fitting. Dry-fit the parts together to make sure that they fit well. Clean off any debris. |
|
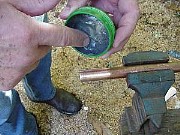
Step 2: Open the flux and apply the flux to both surfaces to be mated. Make sure that there are no debris on the surface. Put the fitting on the end of the pipe. |
|
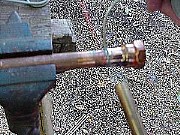
Step 3: Carefully light the torch. Apply the flame to the fitting that you are trying to attach to the pipe. The flux will begin bubbling and might produce smoke. After a few seconds, place the solder onto the joint and wait for the heat of the pipe to melt the solder and draw it into the joint. It is important to note that you do not heat the solder directly. When the solder begins to melt, move the solder around the joint to make sure you get solder around the whole joint. Strike an even balance, don't use so much solder that it begins to drip from the end of the pipe! |
|
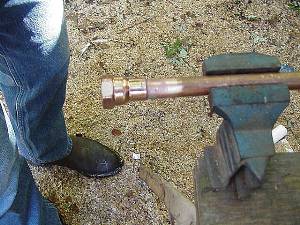
Step 4: While the solder is still hot, use a damp rag to wipe the excess solder from the exterior of the joint. |