|
Cutting the Pieces
For the next step, you must
install the cap molding. For the first wall, cut the molding to length and nail
it to the 1x4 and, depending on how straight the wall is, to the wall. Assuming
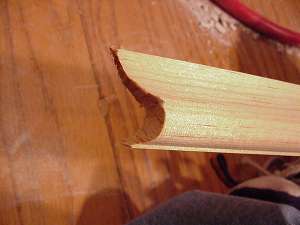
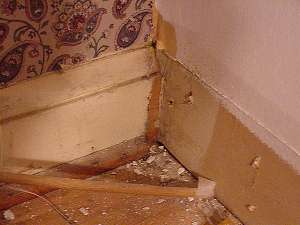
the first corner is an inside one (first picture), the first cut on the second
wall is made at a 45 degree angle. Make the cut so that it slopes toward the
middle of the front. Using a coping saw, cut perpendicular to the face of the
cap molding along the line between the angle and the face (see picture). Once
this joint is good, cut the other end (square) to length and nail the cap
molding in place. If the corners are outside corners, miter the ends at 45
degrees. Continue around the room using the same procedure. Small finishing
nails, about 4 penny are good for this. Make sure that you set all of the
nails.
Now is a good time to fill in
the nail holes and cracks. If the molding is to be painted, I generally use
latex painters caulk to fill the cracks between the molding and the wall and
putty to fill the nail holes. In a pinch, you can also use the caulk to fill in
the nail holes. After you have the caulk in place, run a damp sponge along the
joint to smooth/remove the caulk.
If you are using a clear
finish on the shoe or quarter-round, now is the time to paint the molding
already on the wall. I generally mask off the wall and paint the molding with
an interior latex semi-gloss paint. Whatever you use, make sure that is
compatible with the primer you used.
While the paint is drying, go
ahead and stain/finish the shoe molding. I generally use a "natural" shade
oil-based stain followed by a coat of oil-based polyurethane. If you are trying
to match existing molding, you may have to experiment on a small piece to get
the color right. After the finish is dry, nail the shoe molding in place. Use
a small (I prefer 1 1/2" 4 penny) finishing nail. If you are using hardwood,
you may have to drill holes in the molding so that you do not split the wood.
Drill holes that are just a bit smaller than the nail.
|
|