|
Tile installations that are subjected to
heavy use are liable, over time, to become loose and the wall behind the tile
damaged. If you do not stop and fix it now, the water will damage the framing
behind the wall and that is a major headache. The wall tiles near the faucet
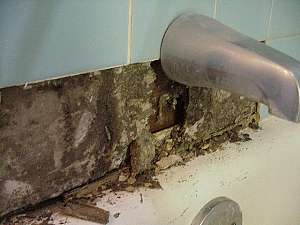
handles in this picture had started to come loose. If I pushed on the wall, the
section at the bottom would move. I started to pry around with a screwdriver
and one of the tiles popped off!
Areas that are most prone to deterioration
are around faucets and corners. The majority of these installations are mounted
on drywall or "green board."
Fortunately, it is possible to remove just
the damaged section and replace it. The project takes about 6 hours (depending
on damage) and is relatively inexpensive if you reuse existing tiles.
|

Damaged tile
|


