Framing a Partition Wall

Many times when finishing a basement or changing the layout of your home you will need to add a wall.  Adding a wall is an easy task for the do-it-yourselfer to accomplish.  The key to wall building is to make sure that your walls are square and plumb.  Out of square or out of plumb walls cause problems with trim, door and window installation.

The other tricky part of wall building is framing the corners.  Depending on whether you are framing an inside, outside, T or L corner dictates how you frame the corner.  The concern here is providing a nailing surface in each corner for hanging drywall.  If the corner is not framed correctly you will have nothing to nail the drywall to. 

This project covers framing an interior, non-load bearing partition wall (it does not support the roof) with no windows or doors.  Make sure that your work is inspected before drywalling.  Note that we have installed this wall in an area that has no drywall to help you visualize what is necessary.

Stud ready to be cut

Stud ready to be cut

Level of Difficulty

Time Required:
 3 hours
 
 
Tools:
Hammer
Tape measure
Chalk line
T-square
Power saw
Pencil
Materials:
Wooden studs
Common nails 16d
Cement nails or concrete fasteners
Safety Precautions
Follow power tools safety rules.
Use eye protection.
Comply with local building codes and call for an inspection when work is completed.

Cutting the Pieces

The first thing to do is to position the the bottom (sole) plate.  Place the sole plate on the floor where you want the wall to be and then cut it to length.  If you are using a circular saw, make sure that you use a square to extend your mark across the board so that you cut straight.  Cut the top plate to the same length.  Measure from a wall across the room to both ends of the sole plate to make sure that the new wall is parallel to the existing wall.  Mark the position of the plate on the floor.  Mark both sides (it is easier to make a mark on both sides at either end and snap a chalk line).  Do not nail the sole plate in place yet.

The second thing to do is to position the top plate.  Using the measurement you made on the floor, measure from the opposite wall and mark the location of the top stud.  It is easiest to mark both ends and snap a line in between with a chalk line.  Measure over 2 1/2 inches and snap another line, this is the outline of the top plate.

Now we have to figure out how to attach the new wall to the existing framing.  The first thing to examine is the ceiling.  Find out where the joists are by drilling holes through the area that you previously marked on the ceiling (this way the new plate will cover the damage).  There are three possible scenarios:

1.  (good) The new wall is parallel to the ceiling joists and is also located directly underneath a joist.  This will allow you to nail directly to the joist.

2.  (good) The wall is perpendicular to the ceiling joists.  The top plate can be fixed to the joists by nailing the plate to the joists where they intersect.

3.  (pain in the neck) The wall is parallel to the joists, but is not underneath one.  The new wall should be fixed to something solid.  This scenario requires that you either relocate the wall or install blocking between the joists so that you have something to nail to.  If you have access to the area above and the wall can not be relocated, here is how to install blocking.  Measure the distance between the joists, cut 2x4's to fit and nail them into place, flush with the bottom of the joists.  Use 16d nails for this.  You should put a block every 16"-24".  Use a regular interval to make your life easy.

Wall is parallel and beneath floor joist

Wall is parallel and beneath floor joist


Wall is perpendicular to floor joist

Wall is perpendicular to floor joist


Wall is parallel and between floor joist and requires blocking

Wall is parallel and between floor joist and requires blocking


Prepare for Wall Erection

There are two methods to installing a partition wall.  The first is to construct the wall and erect the units as one.  The second is to install the wall in place one piece at a time.

The first method works well on new construction and it helps to have some experienced helpers.  You must be accurate in your measurements to make this happen.  

Start by laying out the header and sill plates, marking for studs every 16" on center. Cut the studs to length measuring the floor to joist opening and adding 1/8" to 1/4". This will ensure a tight fit, but be careful not to wedge and raise the floor above.

The studs are nailed using 2-16d common nails. The ends may need king and skimmer stud.  The king studs extends from floor to ceiling and will be 3" longer than the skimmer and other studs.

With the studs assembled, check the wall for square by measuring diagonally. Use your sledge hammer to "persuade" the wall into square.  With some helpers, raise the wall in place and nail it securely. (Skip ahead for sill fastening.)

Layout sill plate

Layout sill plate

Nail through header into studs

Nail through header into studs

Check wall for squareness

Check wall for square

Installing Wall in Place

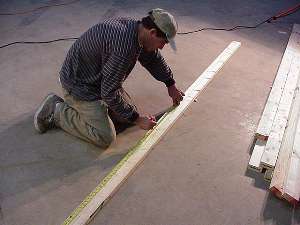
Before you nail up the plates, mark the locations for the studs.  Studs are normally placed 16", on center, apart.  Either make the mark on the edge of the plates at 16" or make you marks on the top of the studs 15 3/4" apart (mark in front of where the stud goes).

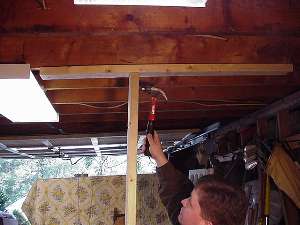
After you have determined how 
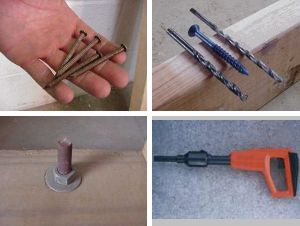
to affix the top plate,  go ahead and nail it into place.  Use 16d nails.  Place at least one nail every couple of feet.  Tack the sole plate in place by not completely driving a nail near each end of the plate.

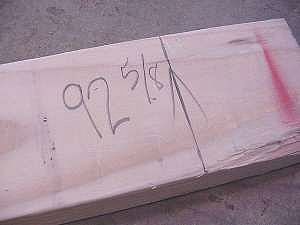
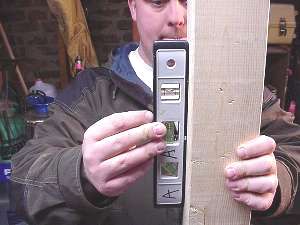
Measure from the bottom of the top plate to the top of the sole plate.  Add 3/16" to this measurement.  This is 
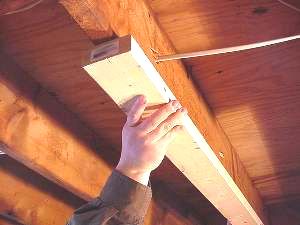
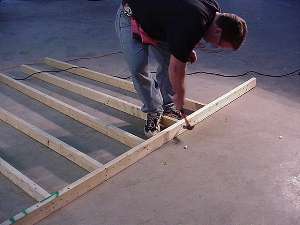
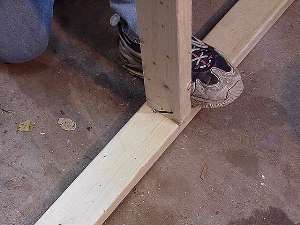
how long the studs need to be.  Cut one stud to length and put it in place.  You will likely have to put the stud in diagonally and tap it into place.  Using a level, check to make sure the wall is plumb.  If not, loosen the sole plate and tap it into place.  Make sure you make identical adjustments to the entire sole 
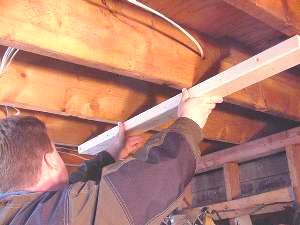
plate.  Check your measurement to the facing wall.  Once the wall is plumb, go 
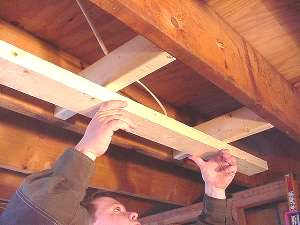
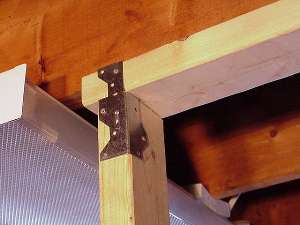
ahead and toe-nail the stud top and bottom.  You toe-nail by holding the nail (16d nails for this) at a 45 degree angle about 2 inches up the board and nailing down through the stud into the plate.  Alternatively, you can use a 
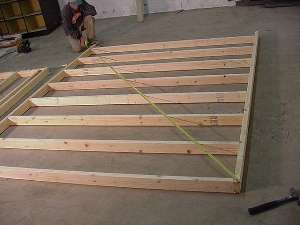
nailing plate with smaller nails (picture down below)  Cut the other studs to the same dimension and toe-nail them into place every 16", on center.  

Tap stud in place

Tap stud in place

Check stud for plumb

Check stud for plumb

Nail plate

Nail plate

Toe Nail the Stud

The studs are toe nailed into the sill plate using four 8 or 10d nails.  Larger nails will tend to split the stud.  Use your foot or a temporary nail to hold the stud in place while toe nailing.  The temporary nail is driven into the sill about 3/4" on the opposite side of the stud at a 80 degree angle to the floor.  The toe nail should be driven in at about 60 degrees from the floor

Fastening the Sill Plate

With the wall in place, the sill plate needs to be secured to the concrete.  There are several options here.  The simplest is cement nails.  Simply pound these in, but be sure to keep your safety glasses on.  For a stronger grip, you can use special concrete screws.  These require a pilot hole in the concrete and a shaft hole drilled in the sill. If bolts were embedded into the concrete when poured, these are the strongest and allow a large washer and must to be through bolted.  For fast installation, power guns are used to fire an explosive and drive a stud nail into the concrete.

Don't forget about inspections.  Be sure to have all rough carpentry inspected before you start hanging drywall!

Toe nail the stud

Toe nail the stud

Fasteners for sill plate

Fasteners for sill plate