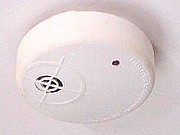
Installing a Carbon Monoxide Detector |
|
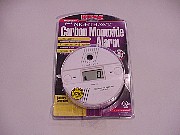
Carbon Monoxide is a colorless, odorless, tasteless gas generated by burning natural gas or other fossil fuels inside the home. Units such as furnaces, gas water heaters and some space heaters generate carbon monoxide as a by-product of combustion. When these appliances are operating properly, the by-products of combustion are either vented to the outside or the levels are too low to worry. However, when a chimney or flue is blocked, a large amount of this deadly gas may be diverted into the home. A carbon monoxide detector will warn you when levels of this gas are above acceptable limits and is cheap insurance for you and your loved ones. |
 |
|
Items needed:
Screw driver
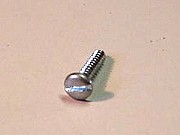
Drill Drill Bits 3/16 inch Plastic screw anchor (comes with detector) Pan head screw (comes with detector) |
Safety Suggestions and Tips
You will normally need a ladder to mount the detector, be careful
to setup and use the ladder correctly.
Follow directions on package for mounting location A CO detector is NOT a replacement for a smoke detector |
Level of difficulty
 Time Required: 30 minutes
|
|
|
|
Steps |
|
|
|
|
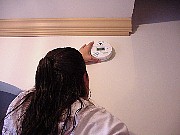
Step 1: Before you simply install the unit, check to make sure you are installing the unit in the correct location. Most manufacturers recommend that you have at least one unit near your families' sleeping area and, for multi-level homes, one on each level. Check the instructions for optimum locations as different brands may work differently. |
|
Step 2: When installing the unit, open the hinged cover or remove the base plate to expose the screw holes. In addition, some carbon monoxide detectors may be used in a "table top" mode by flipping out the small "foot" on the back. |
|
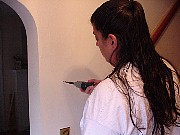
Step 3: The screw anchors need a hole to be drilled first. Do not try to hammer the plastic anchor into the drywall as you will only damage it. Typically a 3/16 inch bit will be required and the anchor can be inserted. Tighten the screw to within 1/8 inch. The previous unit may have been only installed without proper anchors. Don't skip the anchors, the units may fall off the wall. |
|
Step 4: Slip the base plate or back of the unit onto the screws. In addition, if this is a battery-operated unit, don't forget to install the battery and test it. It is good idea to add a date label when you install the new unit. This way you or the next owner of the house will know how old it really is. |
|
Step 5: After you get the unit installed, it will normally require some time to become "acclimated" to the environment. You should test your detector on a weekly basis, it is cheap insurance. Check the directions that came with the unit for testing instructions. Make it an annual habit to replace the battery on your new unit. New Year's Day is a great time to do this. |