Countersinking Screws |
|
There most popular way to attach and repair wooden features in a home is with a screw. Thresholds and other features that are prone to a lot of abuse are normally screwed into place. The problem with screws is that, while they are the one of the best ways to hold wood together, there is nothing more unattractive than a nice piece of hardwood with the head of a screw sticking out. This article will show how to finish off a screw hole so that it looks nice and fits into the overall decor. "Mushroom" plugs may also be used to conceal screws but not on floors. |
 |
|
Items needed:
Drill
Spade drill bits Twist drill bits Screwdriver bit for drill Glue Wooden dowel Hand saw Sand paper |
Safety Suggestions and Tips
Wear safety glasses
Use same wood for dowel and workpiece |
Level of difficulty
 Time Required: 15 Minutes
|
|
|
|
Steps |
|
|
|
|
Step 1: Initially, you will need to decide what size dowel to use in order to conceal the screw heads. Normally something 3/8" to 1/2" will do. It is customary to use dowels made from the same species of wood as the surrounding woodwork. Different species of wood will create accents. |
|
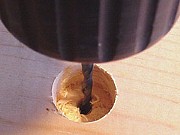
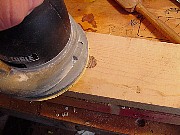
Step 2: Once the screw positions have been identified, use a sharp spade bit (or forstner bit) of the same size as your dowel to drill a shallow (1/2") hole. If the "spurs" on the bit are not sharp, they may not cut cleanly. Make sure to hold the drill square to the face of the workpiece or the hole may become too large. |
|
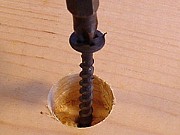
Step 3: Once the first hole is drilled, use a standard twist bit to complete your pilot hole. This hole should be drilled in the center of the first hole. Using a spade bit for the first hole makes this easy as the spade bit has a large spur in the center of the bit which leaves a nice hole. Use a twist bit that is the same size, or smaller, than the shank of the screw. |
|
Step 4: Drive the screw into the pilot hole. Some professionals like drywall screws for this purpose as the drive fast and hold well. A traditional wood screw works just as well. The specific type of screw that is used will depend on the circumstances. Galvanized screws, for example, should be used in areas that are exposed to moisture. |
|
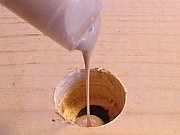
Step 5: Once the screw is set, put some glue in the hole in order to hold the plug. Carpenters glue is the appropriate for this use. Glue that has a dark tint (shown at left) may be used if a darker wood is being used (walnut or oak). Do not completely fill the hole, place a small amount in the bottom and insert the plug into the hole. Turn the plug from side to side to distribute the glue inside. Use a damp cloth to wipe any excess glue from around the dowel. |
|
|
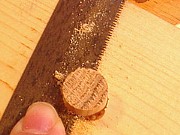
Step 6: Once the glue is set (check package for setting time), cut the plug flush with the surrounding wood. The best saw for this is a Japanese saw called a "Kugihiki" saw and it maybe be found here. Any saw that has little "set" (deflection) to the teeth will do. Note that the Kugihiki saw cuts on the pull stroke, not the push stroke like "American" saws do. A chisel is also appropriate for this job. |
|
|
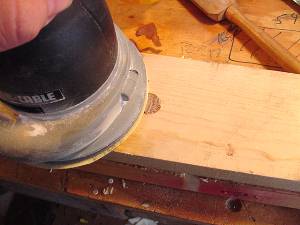
Step 7: Once the plug is cut off, it is a good idea to sand the plug flush to ensure it is flush and produce a finished look. It is especially important when using this method on thresholds and floors that the plug be flush. Any high spots will receive more abuse and the finish will wear more quickly. |
|
|
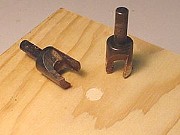
Optional: If the screws are being installed in flooring, a more finished appearance may be produced using "face grain" plugs. These plugs are normally a do-it-yourself job and should be cut from the same stock, if possible, that is being used for the job. |
|
|