Repairing a Damaged Drywall Joint |
|
The joint between two pieces of drywall is key to a good repair. Joints can be damaged by water or mechanical damage. Practice is the key to getting a good joint. If you can, you might want to experiment on two pieces before you take on a real wall. As with other drywall procedures, multiple thin coats are the key. One note, drywall compound is sometimes referred to as "mud." |
 |
|
Items needed:
Joint Compound (mud) |
Safety Suggestions and Tips
Be careful if using a ladder.
Use thin coats of compound, this is very important if working on the ceiling as the joint will sag if you use too much.. |
Level of difficulty
 Time Required: 2 hours
|
|
|
|
Steps |
|
|
|
|
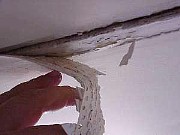
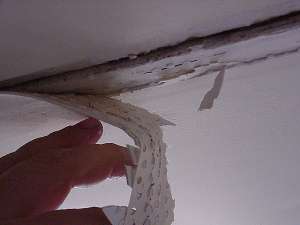
Step 1: Start by pulling the old tape from the joint. This should cause the joint compound to fall from the joint. If it does not, you should use a small scraper to take out the remaining tape and compound. |
|
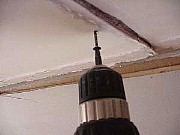
Step 2: Many times when water damage has occurred, the drywall on the ceiling will sag. If this is the case, find the rafter (stick something through the joint) behind the drywall and use drywall screws to return the drywall to it's original position. Make sure that the screws go below the surface of the drywall. |
|
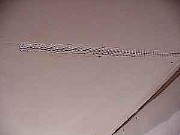
Step 3: If you are using adhesive-backed drywall tape, stick it on the joint. If not, lay a thin bed of joint compound on the joint and then lay the tape onto the compound. Use the knife the press the tape firmly into the compound. |
|
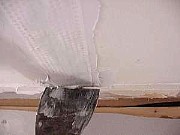
Step 4: If you are using normal paper tape, wait for the compound to setup before continuing.) Place another thin layer of compound onto the tape. Do not try to fill in the whole area at once. Build it up slowly, sanding between coats. When you get to the same level as the existing drywall, "feather" the compound out over the drywall to conceal the repair. |