Installing Base Molding

Installing or replacing base molding is a very easy job.  The most common base molding is composed of three pieces.  A 1x4 nailed to the wall, a piece of base cap molding nailed to the 1x4 and a piece of shoe molding or quarter round nailed to the 1x4.  Older homes may have a 1x6 or 1x8 nailed to the wall.  The 1x4 is pretty standard nowadays.

The other type of base molding is what looks to be a 1x6 that has been milled to resemble two pieces of the three piece molding.  This molding is easier to install but lacks the distinct shadow lines of the three piece molding. 

  You should use the same type of molding, if possible, as exists elsewhere in your home.  This will make the look of your molding as consistent as possible.

Side view of base molding

Side view of base molding

Level of Difficulty

Time Required:
1 hours
 
 
Tools:
Miter box
Back saw
Coping saw
Hammer
Nail set
Stud finder
Materials:
Base molding (cap, shoe and back)
Finishing nail (4d)
Stain and finish
Paint
Safety Precautions
Ensure adequate ventilation when staining and painting.

Plan and Cut

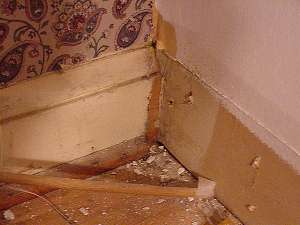
Examine the area that you want finish.  Depending on whether you have inside or outside joints will determine how you deal with your layout.  In general, you install the 1x4 molding first, the cap molding second and the shoe or quarter round last. 

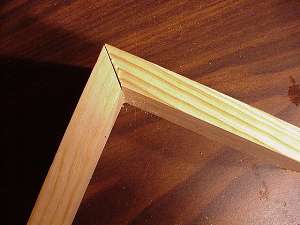
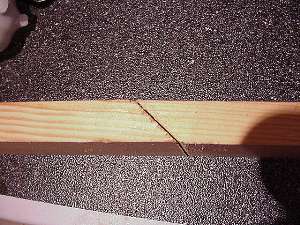
For the 1x4, measure your walls and cut the boards to length.  When marking the boards, mark on the side that is towards the wall.  For inside corners you can use butt joints if you like (I prefer 45 degree miter cuts).  The outside corners need to be mitered at 45 degree angles. If the run is longer than your longest board, make sure that you use a scarf joint.  Miter the ends of the boards to 45 degrees.  The overlap will help hide any gaps that may develop when the trim expands and contracts.

Prime the trim before installing it.  Make sure that you use an appropriate primer for the type of paint that you are using.   Do Not skip this step.  If the 1x4's have knots or sap pockets, these will work their way through the paint if you do not prime them.

  After the primer has dried, secure the trim to the wall.  The 1x4's are secured to the wall by nailing the trim into the studs behind the wall.  The easiest way is to use a stud finder. (Buy one here)   Use 2" 8-10 penny finishing nails.  Make sure that you "set" the nails by using a nail set to drive the nail head below the surface of the board.


Miter box

Miter box

Miter cut on 45 degree angle

Miter cut on 45 degree angle

 Scarf joint

Scarf joint

Cutting the Pieces

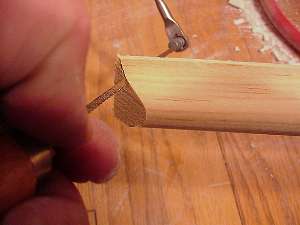
For the next step, you must install the cap molding.  For the first wall, cut the molding to length and nail it to the 1x4 and, depending on how straight the wall is, to the wall.  Assuming the first corner is an inside one (first picture), the first cut on the second wall is made at a 45 degree angle.  Make the cut so that it slopes toward the middle of the front.  Using a coping saw, cut perpendicular to the face of the cap molding along the line between the angle and the face (see picture).  Once this joint is good, cut the other end (square) to length and nail the cap molding in place.  If the corners are outside corners, miter the ends at 45 degrees.  Continue around the room using the same procedure.  Small finishing nails, about  4 penny are good for this.  Make sure that you set all of the nails.

Now is a good time to fill in the nail holes and cracks.  If the molding is to be painted, I generally use latex painters caulk to fill the cracks between the molding and the wall and putty to fill the nail holes.  In a pinch, you can also use the caulk to fill in the nail holes.  After you have the caulk in place, run a damp sponge along the joint to smooth/remove the caulk.

If you are using a clear finish on the shoe or quarter-round, now is the time to paint the molding already on the wall.  I generally mask off the wall and paint the molding with an interior latex semi-gloss paint.  Whatever you use, make sure that is compatible with the primer you used.

While the paint is drying, go ahead and stain/finish the shoe molding.  I generally use a "natural" shade oil-based stain followed by a coat of oil-based polyurethane.  If you are trying to match existing molding, you may have to experiment on a small piece to get the color right.  After the finish is dry, nail the shoe molding in place.  Use a small (I prefer 1 1/2" 4 penny) finishing nail.  If you are using hardwood, you may have to drill holes in the molding so that  you do not split the wood.  Drill holes that are just a bit smaller than the nail.

Clear existing molding

Clear existing molding

Using coping saw to cut profile edge

Using coping saw to cut profile edge

Finished coping cut edge

Finished coping cut edge