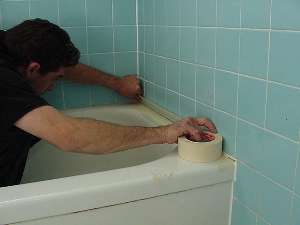
Re-Caulking a Tile Surround

Re-Caulking a tile surround is a necessary part of the maintenance that tile tub surrounds require.  Caulk keeps water from penetrating the joints of the surround as well as the faucet hardware.  If you do not perform this maintenance every now and again, you will be visiting our write up on repairing water damaged tile surrounds!

Tile surrounds require caulk wherever two different surfaces meet.  The gaps between adjacent walls, the floor and the tub and around the fixtures.  Grout applied in these areas does not usually hold up.

In general, it is best to use 100% silicone caulk for most of this job.  These tubes are usually labeled "Kitchen & Bath" or something similar.  Silicone caulk is difficult to work with, but the longevity of the stuff is unbeatable.  Don't have a caulk gun?   Buy a caulk gun

In order to view our video how-to, click here

Caulk tub

Caulking bathroom tub

Level of Difficulty

Time Required:
 2 hours
 
 
Tools:
Caulking gun
Grout saw
Utility razor scraper
Materials:
Silicone caulk
Masking tape
Solvent for caulk
Safety Precautions
Follow proper procedures for handling solvents.

Cutting the Pieces

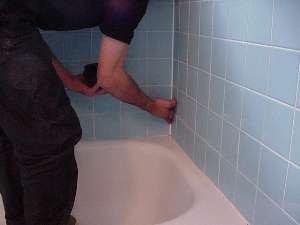
The first thing to do is to remove the old caulk, grout and grime that are in the corners, between the tub and the wall and between the tub and the floor.  These surfaces must be free of old grout, caulk and grime for the caulk to form a good seal.  Remember that where two surfaces meet it is usually best to use caulk.

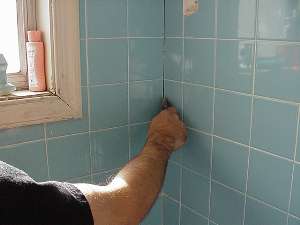
The best method for removing the old grout is to start with a utility (razor) knife.  If there is crumbling grout, simply run the knife down the joint several times until it comes loose.  Use a reasonable amount of pressure.  The knife will rapidly become dull but is not necessary to replace the blade until it becomes completely dull or breaks.  If the grout is very stubborn, you may have to use a grout saw.

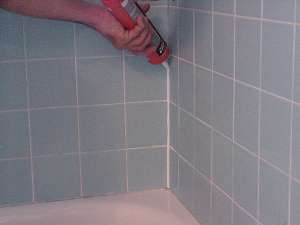
The best way to get rid of the caulk is to use a single-edge razor blade and cut/scrape it out.  If you make a cut against each wall and then scrape it out it will likely start to "roll" out of the joint and is fairly easy to remove.

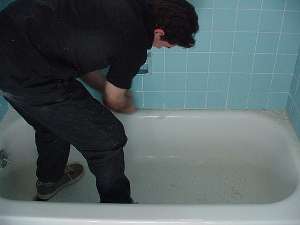
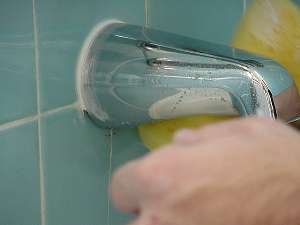
There is no magic way to get rid of grime (soap scum, etc).  Good, old-fashioned elbow grease is best but make sure that if you use a cleaner that it does not leave a residue.  Sometimes we find that a normal scouring pad, used dry, will get rid of soap scum as effectively as the best cleaners. 

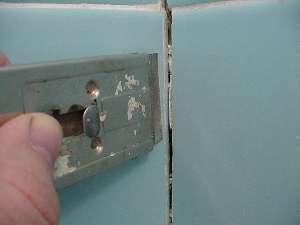
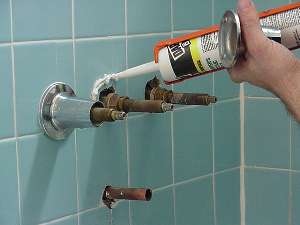
Examine the hardware (valves handles and spigot).  If there is buildup around the flanges then it is best to remove them and cleanup the tiles and hardware.  The handles are usually held in by a screw.  Sometimes there is a faceplate that must be removed.  
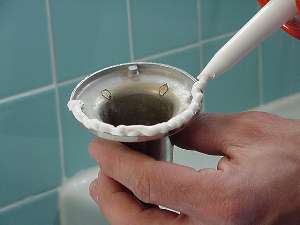
The spigot can be the most challenging.  Look on the underside of the spigot.  If there is a hole in the bottom towards the wall, a hex-head screw will likely be holding the spigot on.  Loosen the screw to remove the spigot.  If there is no screw, the spigot might be screwed on.  Turn the spigot with a pipe wrench.  DO NOT get to tough with it.  If it does not come off easily, forget it and clean it up the best you can.

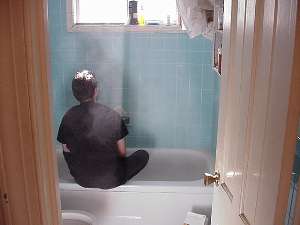
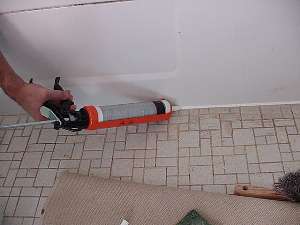
After all of the old sealer is removed, clean up all of the leftover debris.  The area must me clean!  After vacuuming or wiping up the debris, we like to clean the area to be caulked with a solvent.  One that we find works well is mineral spirits.  Just a quick wipe down to get rid of any residue.  Let the cleaner dry completely before continuing.  MAKE SURE that if you use a solvent it will not harm your surround.

Scrape out old grout

Scrape out old grout

Scrape wall around tub

Scrape wall around tub

Clean corners carefully

Clean corners carefully

Getting everything ready

When all of the debris have been removed and the cleaners are dry, it is time to put down the caulk.  If you are using 100% silicone (and you should be), it is a very good idea to first tape the joints.  Using masking tape, put a piece of tape on either side of the joint.  The exposed joint should be anywhere from 1/8" - 1/4" wide.  You should tape all of the joints before applying caulk.

Get a small cup or coffee mug and fill it 1/2 full of water.  To the water add a bit of liquid soap.  Put your fingers in the water and rub them together.  Your fingers should "slide" over one another.  If they do not, add some more soap.

Using a razor knife, trim the plastic tip on the caulk tube.  Cut near the end of the tip, it is better to put on too little caulk and add more later than to put on too much and have to pull it off.  The cut should leave the tip with a 30-45 degree angle cut.

Apply masking tape

Apply masking tape

Soapy water

Soapy water

Trim end of caulk tube

Trim end of caulk tube

Applying the Caulk

There are two methods for applying caulk.  You can "pull" it or "push" it.  Pulling the bead lays the caulk out behind the nozzle.  All of the pictures to the left show "pulling" a bead.  Some people claim that pushing the bead provide better results.  In our experience, pulling provides better results for most people.

Start applying the caulk at one end of the joint.  Apply gentle but constant pressure to the caulk gun and pull the bead along the joint.  You may have to work from both ends if the corners are tight.

When the joint has been completely covered, release the pressure on the caulk gun and set it aside.  Working quickly, dip your fingers into the soapy water and begin to smooth the bead.  You will likely have to dip your fingers several times.  If at any time during the process you get silicone on your fingers, stop and clean it off.  Silicone sticks to itself and if there is silicone on your fingers you will pull the caulk from the joint and spoil the look of the joint.

Pull the tape from the joint, making sure that you do not pull up adjacent tape.  Inspect the caulk, it should completely seal the joint.  If it does not, wet your finger again and seal any gaps.  The most common place for this to occur are in the grout joints.  Sometimes pulling the tape off will pull the caulk away from the grout.

Caulk along base of tub

Caulk along base of tub

Start bead of caulk

Start bead of caulk

Smooth the bead of caulk

Smooth the bead of caulk

Caulk the Hardware

Now it is necessary to caulk the valve flanges and the spigot.  The best way to do this is to remove the flanges and spigot, clean them up and then caulk under them.  If they are already clean and there is no buildup then you can caulk around them.  Even though we used silicone caulk for the rest of the job, we recommend that you use latex caulk for this part.  Latex caulk does not last as long as silicone but cleans up with water and provides better results for most do-it-yourselfers.

If you are going to use silicone, this is probably the most difficult part of the job.  Since silicone caulk is so messy and sticky this job takes time.  If you removed the flanges, you need to screw the flange back on and carefully tape around the flange area. 

There are two ways to apply the caulk.  Using the first method, you can apply the caulk directly to the back of the flanges.  The second way requires you to examine the tile and find the "gunk line" on the tile that outline where the flanges were and apply the caulk to the tile.  Either way is ok.  If you removed the flanges, apply the caulk and then screw the flanges back on.  The flanges will seal themselves as they get tight.  Wipe the caulk from around the flanges.

When caulking the spigot, only caulk around the top (see the picture).  This allows any water that might buildup behind the spigot to drain out instead of damaging the tile substrate.

Apply caulk around the spigot flange

Apply caulk around the spigot flange

Apply baseline of caulk

Apply baseline of caulk

Caulk around spigot

Caulk around spigot