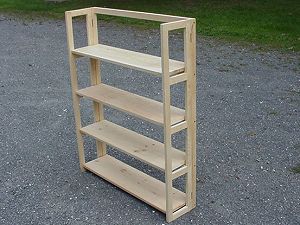
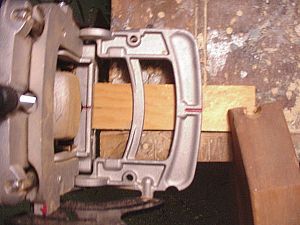
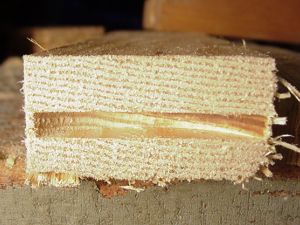
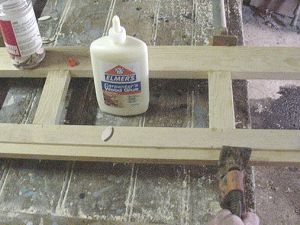
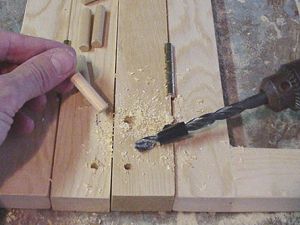
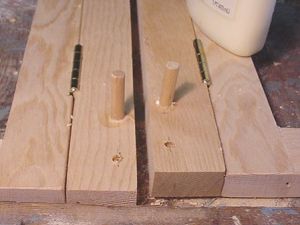
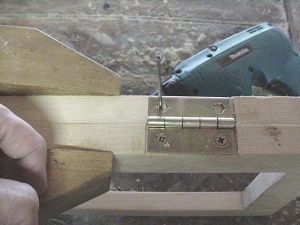
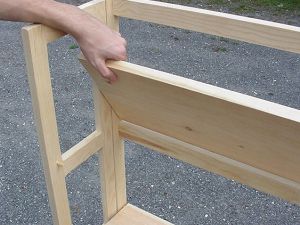
Folding Wooden Shelf

A portable or folding shelf is great for those unanticipated needs such as yard sale, Christmas or other times when you need to display or store things. The folding shelf is a fairly simple woodworking project and uses a plate (biscuit) joiner for assembly.  The unit pictured here was constructed from pine but most any wood may be used.  You can stain and finish the shelf as you like but polyurethane is a good, tough, finish.

Folding Shelf

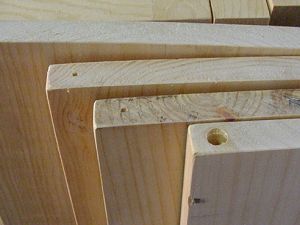
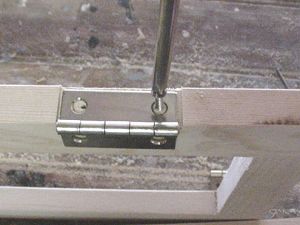
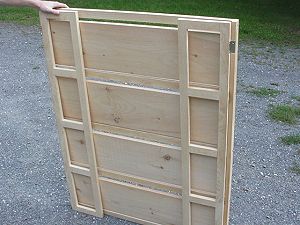
Finished Folding Wooden Shelf

Cutting the Pieces

Start by marking and cutting the pieces necessary.  In our project the width is 36 inches and the unit stands 48" tall.  There are four shelves, two folding (hinged) end pieces and a back frame.   If you are going to use a clear finish, start with 1 x 10 stock of clear, select or D and better pine. Lower grades may be used if you are painting the project but the lower grades are often not as straight.  The side shelf standards and the back frame are made by cutting the stock to length. You can rip the rails and cross members to 1-1/2 inches. This is a good time to sand or plane the ripped 3/4" faces.

Lumber stacked and ready

Rip rail pieces

Rip rail pieces

Lumber ready to go

Cutting the Pieces

To join the frame pieces, a biscuit joiner is used.  The pieces are laid out for assembly.  Carefully arrange the pieces so that joints are flush and square.  At this point, carefully make a mark on both the frame and cross member in the middle of the joint.  This mark is where you will align the cutting guide on the joiner.  Be careful not to make the mark too close to either side of the work piece or the blade from the joiner may cut through the side, exposing the biscuit during final assembly.  With one of the pieces clamped to your workbench, make the cut for the biscuit.  Place the alignment mark on the joiner so that it is lined up with the mark you made earlier.  It is also important that the horizontal fence is firmly against  At this point, start the joiner and gently push the tool forward.  Make sure you have a firm grip on the joiner as they have a tendency to "walk", especially when cutting a slot in end grain.  Let the joiner recoil from the board face and move onto the next.

Biscuit joiner

Biscuit joiner

Plunge joiner

Hold steady on end cuts

End cut

End rail biscuit cut

Glue biscuits and clamp side frames

Apply glue in the biscuit cut in the frame and end piece.  Some squeeze-out is ok but avoid using too much glue.  Using pipe or adjustable clamps, clamp the frame together and wipe the excess glue with a damp sponge. Tighten the clamp until the pieces are firmly clamped together but not bending.

The shelf is made of 1" x 10".  In order to allow the shelf to swivel, we use a dowel on each side.  We have used a wooden dowel (5/16") cut to 1- 1/4" long and the ends slightly sanded. Drill a slightly large hole in two ends of the shelf.

For a more secure shelf, use a 1/4" metal rod for the hinge pin.  This will require smaller diameter holes and allow for more weight to be carried by the shelves.

Glue biscuit

Glue biscuit

Use bar clamp

Use bar clamp

Drill holes in corner of shelves for dowel pin hinge

Drill holes in corner of shelves for dowel pin hinge

Using dowels for hinging the folding shelves

If you can find a smooth metal rod, this would make a more sturdy support.  In the frames, drill 5/16" hole to a depth of 5/8".  If you don't have bit collars, a piece of electrical tape can be used as a depth gage.  Glue the dowels to the frame piece.

With the side frame standards ready to go, you need to recess both the side and end frame pieces for a small brass hinge.  Use either a chisel or your table saw to recess 1/16 to 3/32".

Drill hole for dowel

Drill hole for dowel

Dowel hinge for shelf

Dowel hinge for shelf

Drill holes in corner of shelves for dowel pin hinge

Drill holes in corner of shelves for dowel pin hinge

Install the hardware

When installing the hinges, one trick is to clamp both the side frames and the back frame together.  Next, use an awl or nail to start the screw.  This will ensure that when you screw the hinge in place that the pieces will line up when opened.  It will also keep the wood from splitting.

The back rails are secured using 2-1/2" wood screws.  Pre-drill a pilot hole in the end frames. Assemble the shelf on the dowels and screw the side frames together.

Clamp both pieces together

Clamp both pieces together

Screw in brass hinges

Dowel hinge for shelf

The Final Step

The shelves are cut approximately 1/4" less than the back rails.  This should allow for ample clearance so that the shelves easily lift and  fold.  You've done and completed a lightweight, easily-stored, moved and set-up folding shelf!

Shelves lift for folding

Shelves lift for folding

Folder shelf unit

Folder shelf unit