Painting Kitchen Cabinets

This is one of the most requested articles that we've seen lately.  We do not know why it has become popular lately but, nevertheless, here it is.

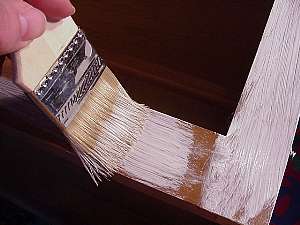
Let us start with a quick reality-check:  Painting kitchen cabinets, especially those with very glossy finishes, does not produce a finish that is as durable as painting plain wood.  The finish is fairly tough but will not resist forks, pans and other abuse often 
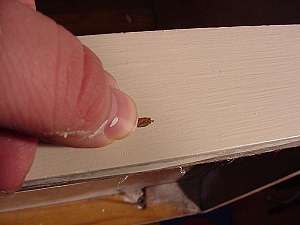
seen in kitchens.  I let the paint dry for 6 hours and attempted to scratch it.  I had to push my fingernail pretty hard (it hurt) against the finish to scratch it, but scratch it did.  However, after 6 days, I could barely make a dent in it.  If you are going to do this, try it in an inconspicuous place first.

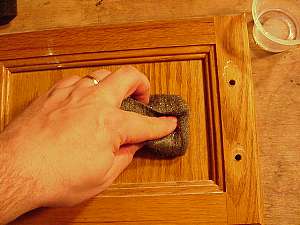
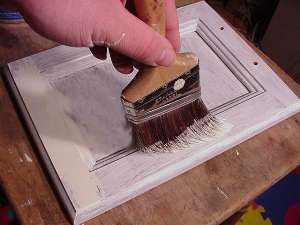
If your cabinets have a high-gloss finish, you might have to use a deglosser in addition to the steps illustrated here.  Parks makes one.  You might also consider other alternatives.

High quality finish needs ample time to cure

High quality finish needs ample time to cure 

Level of Difficulty

Time Required:
 4 hours
 
 
Tools:
Quality paint brush
Screw driver

Materials:
Quality paint
Deglosser
Sand paper (320-400 grit)
Steel wool (fine and extra fine)
Paint thinner or mineral spirits
TSP or cleaner
Safety Precautions
Adequate ventilation required during and while paint is drying.

Clean Up

The first thing to do is to remove all of the hardware.  Take off the hinges and handles.  After you take off the handles, examine the area around where the hinge was.  This will give you a good idea what you are up against.  If there is a good-sized ring of crud around it, you are going to need plenty of elbow grease.

Now you have to clean all of that crud up and remove any wax on the surface.  We have found that TSP cleaner or mineral spirits give good results.  If you use mineral spirits, do so with plenty of ventilation.

If using mineral spirits, dip the steel wool in the mineral spirits, wring it out slightly and then being scrubbing.  Make sure that you scrub all areas.  You need to remove the wax along with the dirt.  If there is wax left on the surface, the primer and paint will not hold well to that area.  Make sure that you clean the areas of the cabinet that you are going to paint as well.  When done, wipe down the wood with a rag and set it aside to dry.

If you use TSP, employ a good scrub brush and plenty of elbow grease to get rid of the gunk.

Next, lightly sand all of the surfaces to be painted with 320-400 grit sandpaper.  You do not need to sand down to bare wood.  This will etch scratches into the finish and give the paint and primer something to hold onto.  If the sandpaper starts to get loaded with gunk, you did not clean the cabinets completely.  Using a rag, wipe down the doors and face frame to remove all dust.

Unscrew door handle

Unscrew door handle

Remove dirt and grime around handle

Remove dirt and grime around handle

Clean door with steel wool

Clean door with steel wool

Prime and Paint

Now you have to prime the surface.  Use a good quality primer for this that is compatible with the top-coat you are going to use.  Kilz and Zinnser are two manufactures that have web sites.  Using a good quality trim or sash brush, apply the primer.  Apply a good, smooth coat, being careful not to glop it on.  Any lumps will show through the final coat(s).  Following the label directions, let the primer dry completely.  If there are uneven spots, it might be a good idea to lightly sand after it dries with a 400 grit paper.

After the primer has completely dried, apply the topcoat.  We highly recommend a quality paint, it will help your finish last longer.  In our photographs, we used a semi-gloss latex paint as it cleans easier.  We also recommend that you scuff-sand before the second coat.

Apply prime coat

Apply prime coat


Finish with quality paint coat

Finish with quality paint coat