Wall Painting

Wall painting is a pretty straightforward exercise.  As long as you are careful not to slop paint around and mask off all areas you do not want painted, it goes pretty fast.  One tip, while shopping make sure you pick up an extension pole for the paint roller.  It will save you from hauling around a ladder.

While we can not help you with the color you want to use, we can give you some pointers about what kind of paint to use.  For "normal" rooms, I prefer a flat latex paint.  If applied with a roller, it will help hide any flaws in the wall.  You can use oil if you like but it smells more and dries slowly.   For high-traffic areas and kitchens, I prefer a "satin" or "semi-gloss" paint as they seem to endure scrubbing and cleaning better.  Bathrooms are their own special case and require "bathroom" paint.  Bathrooms are not extensively covered in this project.  Click here for a short discussion on primers.  Trim is normally painted with a semi-gloss or gloss paint.

This Project article covers painting an interior room with a roller.

Painting the wall

Painting the wall

Level of Difficulty

Time Required:
 4 hours
Tools:
Paint brush
Roller and tray
Drop cloth
Respirator
Materials:
Paint
Masking tape
Safety Precautions
Ensure that there is adequate ventilation.
Use respirator.

Prepare to Paint

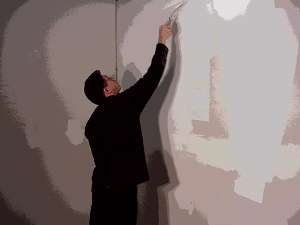
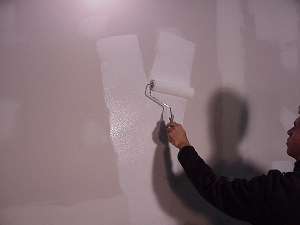
The first step is to prepare the surface for painting.  If you are painting the entire room, paint the ceiling first.  The methods used on the walls are the same as the ceiling.

Remove any loose paint and debris from the wall.  If the area that you are painting is a kitchen or bathroom it is an excellent idea to clean the wall with a mild solution in order to remove any grease and/or soap that might be present.  If you are painting over gloss or semi-gloss paint, it is a good idea to scuff sand the surface.  Using a 120 grit piece of sandpaper, lightly sand the surface.  Not so much that you sand into the paint but enough to roughen the surface.  You have to give the new paint the best possible surface to adhere to.  A good primer will help. 

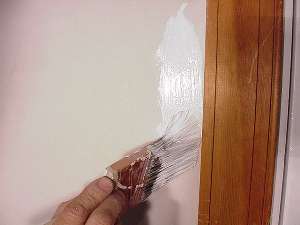
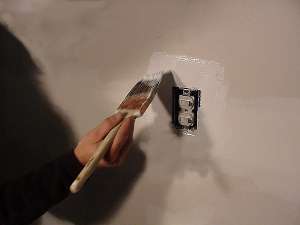
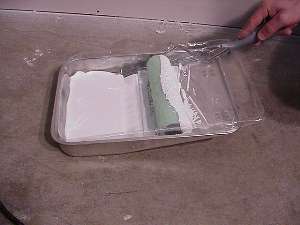
When the wall is clean and any debris cleaned up, put down a drop-cloth to catch any paint splatters.   If you are really good with a trim brush you might 
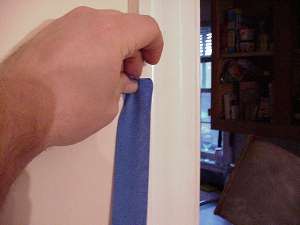
skip masking the trim off but, for the rest of us, it is best to mask off any areas that you do not want to get paint on.  These might include moldings around doors, windows or baseboards.  Use masking tape, it is available at the paint store and it does not stick so tightly as to pull wallpaper or painting from surfaces.  I find the blue 3M tape works best.  It does not "shred" like the traditional yellow masking tape and comes up easier.

Safety Note

Before opening any paint, it is appropriate to talk a bit about safety.  You should wear eye-protection when painting and provide adequate ventilation.  Paint contains solvents that are harmful to humans.  Check the container for specific warnings.  Make sure that you open some windows and use a fan to provide adequate ventilation.  If this is insufficient, use a respirator, increase ventilation or leave the area.

Safety Note:

Apply masking tape

Apply masking tape

Masking tape to cover molding and trim work applied

Masking tape to cover molding and trim work applied

Before You Begin Painting

Before you get paint all over, you need to plan how you are going to paint.  If you are painting the entire room, do the ceiling first.  If the area is large then you will have to paint in phases.  Try not to let the paint between sections dry before continuing.  The first step is to "cut-in" the wall areas around trim and outlets.  The second step is to roll paint onto the wall and the third is to cleanup.

"Cutting-In"

When cutting-in, make sure you do not get so far along that you will not be able to roll over the cut-in areas before they dry.  Rolling over the brush marks will help hide them.  

I like to use a 3" "Sash Brush" with a combination bristle for this job.  They have an angled end that allows the painting of difficult areas.   The combination bristle provides good results with different types of paint.  Dip the brush about an inch into the paint, scrape off the excess on the lip and, holding the brush at a 45 degree angle, run the brush down joint between the trim and the wall.  If you are not using masking tape you may have to sneak up on the line between the trim and wall.  After you have cut-in, smooth the paint by holding the brush perpendicular to the surface and going over the area to smooth it out.

Cut-in paint near trim molding

Cut-in paint near trim molding

Cut-in paint around electrical switch

Cut-in paint around electrical switch

Roll the Wall

The roller cover that you use depends on the wall surface.  A lower nap cover is suitable for smooth walls.  I prefer the covers with the plastic inserts as they can be washed and reused.  Take out the paint tray and pour enough paint into the deep end to fill it about half way.  Use the sash brush to clean the groove in the top of the bucket.

Roll the roller down the pan and about halfway into the paint.  Pull it back and work it up and down the pan to spread the paint over the entire roller cover.

Start near an area that you already have cut-in.  Holding the roller up to the wall, roll a 2' "V" onto the wall.  Then work the paint out into a smooth coat.  Make sure that you roll over any areas that you cut-in.  Get as close as you can to the molding in order to hide the brush strokes to the extent possible.  While painting, you will likely leave "lines" on the wall.  These lines are areas where the paint is thicker.  You need to go over these lines in order to evenly distribute the paint.  Go over the line in the same direction.  If this does not get rid of the line then roll over it perpendicular to the line (see picture).

Clean Up

I generally use a newspaper to remove the roller cover and then throw it away.  You can clean these or put them in a sealed plastic bag if you want to re-use it.  If you are using latex paint, everything will clean up with water.  If you used oil, you need to use thinner or mineral spirits, but with roller this is not very cost effective.

Roller and pan

Roller and pan

Start by rolling a V or W pattern

Start by rolling a V or W pattern

Roll entire wall surface

Roll entire wall surface