|
Caulk the Hardware
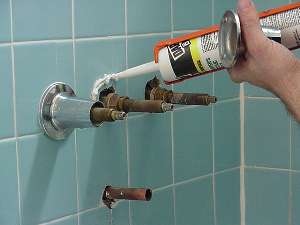
Now it is necessary to caulk the valve
flanges and the spigot. The best way to do this is to remove the flanges and
spigot, clean them up and then caulk under them. If they are already clean and
there is no buildup then you can caulk around them. Even though we used
silicone caulk for the rest of the job, we recommend that you use latex caulk
for this part. Latex caulk does not last as long as silicone but cleans up with
water and provides better results for most do-it-yourselfers.
If you are going to use silicone, this is
probably the most difficult part of the job. Since silicone caulk is so messy
and sticky this job takes time. If you removed the flanges, you need to screw
the flange back on and carefully tape around the flange area.
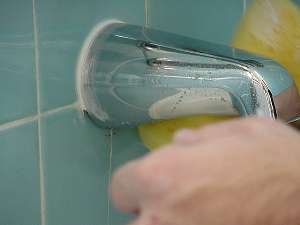
There are two ways to apply the caulk.
Using the first method, you can apply the caulk directly to the back of the
flanges. The second way requires you to examine the tile and find the "gunk
line" on the tile that outline where the flanges were and apply the caulk to the
tile. Either way is ok. If you removed the flanges, apply the caulk and then
screw the flanges back on. The flanges will seal themselves as they get tight.
Wipe the caulk from around the flanges.
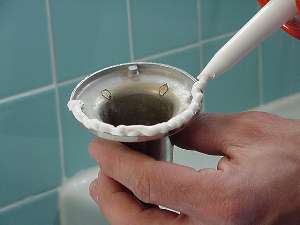
When caulking the spigot, only caulk
around the top (see the picture). This allows any water that might buildup
behind the spigot to drain out instead of damaging the tile
substrate.
|
|