|
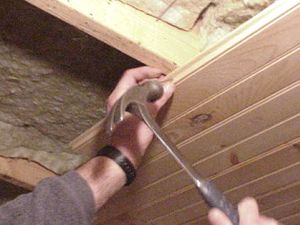
Nailing the boards
For the ceiling, start at the edge
of the room. Use a power miter saw to trim the rough ends of
each board. This paneling is just under 5/8" thick and
requires a 4 or 5d nail (if you can find them). Use a scrap
piece of board as a block to hammer the boards tight. Be
careful not to make the boards too snug, especially if the humidity
is low or the temperature below normal. The tongue and groove
will swell perpendicular to the grain. You will also
experience several warped board which need persuasion. Get a
helper to push any warped boards in place while nailing.
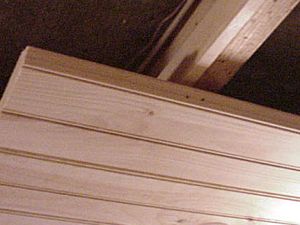
In the ceiling, avoid nailing
directly though the face of the board. Use two nails,
separated by 1/2 - 3/4". It is also helpful to nail each
at a slightly different angle. This will help prevent the
nails from pulling loose over time. Set the nail heads with a nail
set.
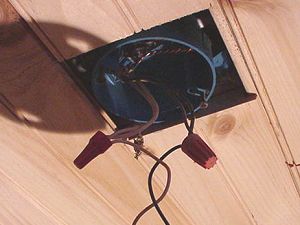
When you get to a ceiling light
fixture, skip the 4" board and pick up on the other
side. The diameter of the light fixture should easily cover
this.
|