|
Working around the obstacles
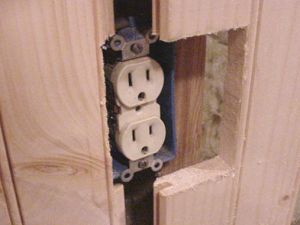
When working around electrical
outlets it is advisable to turn the power to those boxes off. Run your power tools
with an extension cord from another circuit. Before adding the paneling,
ensure that the box is mounted to take
the thickness of the wood. The front edge of the box should be
flush with the finished face of the paneling. If need be, pull
the nails or screws holding the box and reposition it forward.
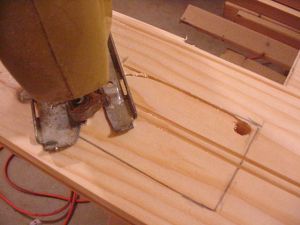
As the paneling is applied, the box is
sometimes at the seam between two panels. Cut the board to
length and hold in place. Mark the top and bottom and measure
how deep the cut needs to be to notch around the box. Use a
jig saw to make the cut.
When the box is in the middle of the
board, a square hole must be cut. Again, hold the trimmed
board in place to mark the top and bottom. Use a tape measure
from the edge of the face, not the tongue, for the left and right
edge. Start by drilling a 1/4-1/2" hole and make the
cutout.
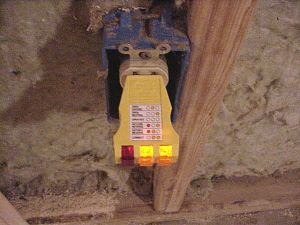
Before nailing up the board, this
would be a good time to check the outlet for proper wiring.
Plug in a tester and check that the proper lights are illuminated.
|