|
Installing Wall in Place
Before you nail up the plates,
mark the locations for the studs. Studs are normally placed 16", on center,
apart. Either make the mark on the edge of the plates at 16" or make you marks
on the top of the studs 15 3/4" apart (mark in front of where the stud
goes).
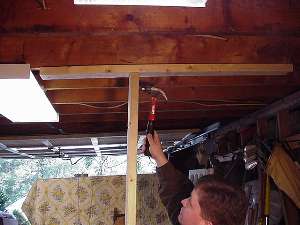
After you have determined how
to affix the top plate, go ahead and nail it into place. Use 16d nails. Place
at least one nail every couple of feet. Tack the sole plate in place by not
completely driving a nail near each end of the plate.
Measure from the bottom of the
top plate to the top of the sole plate. Add 3/16" to this measurement. This is
how long the studs need to be. Cut one stud to length and put it in place. You
will likely have to put the stud in diagonally and tap it into place. Using a
level, check to make sure the wall is plumb. If not, loosen the sole plate and
tap it into place. Make sure you make identical adjustments to the entire sole
plate. Check your measurement to the facing wall. Once the wall is plumb, go
ahead and toe-nail the stud top and bottom. You toe-nail by holding the nail
(16d nails for this) at a 45 degree angle about 2 inches up the board and
nailing down through the stud into the plate. Alternatively, you can use a
nailing plate with smaller nails (picture down below) Cut the other studs to
the same dimension and toe-nail them into place every 16", on
center.
|

|


